I absolutely HATE this kitchen!!!
There are so many features about it that just do not make sense. Also, whoever painted the cabinets used the worst paint imaginable… it is gummy and shows all of the flaws!

The Starting Point


Also, wanna know why there are tiny soffits above the island and above the fridge? The previous homeowners just installed the lighting directly onto the ceiling instead of insetting it.
The drywall is a true disaster… I like to call it the “homeowner’s special” because it actually royally sucks.
Who tiles a kitchen counter like that?? and the flooring looks like it came straight out of an early 2000’s Wendy’s.
Oh and the best part?… mouse shit in almost every single cupboard and drawer…
The Concept
Out with the old and in with the new:


The Disclaimer
Because this fixer upper has many needs, we must be strategic in how we prioritize our projects. Not to mention, we also have a bit of self-diagnosed DIY ADHD… we have so many projects we want to do, that we kinda do them all at once.
So, the following process is part of a much bigger picture (check out our other projects for more context!). We have to prioritize some other projects around the house (such as redoing the siding to stop the mice problem…) and also work within some of the confines of the materials already in place. For example, the gray vinyl flooring and white vinyl windows would not be my first choice, personally. But, since the entire house is has new flooring and windows, we’ll be carrying that through the kitchen renovation.
The process
1. Removed peal and stick wall paper… ASAP


First thing’s first… I HAD to remove this peal and stick wall paper. Probably less than 24 hours after getting the keys to this house, I had this wall paper down…
I know what you might be thinking… it doesn’t seem that bad all things considered. Believe me when I say this photo does it justice! It was nasty and the large print really dwarfed the already very tight space. Although the wall behind the wall paper wasn’t much better, honestly it instantly made the house feel more like our own. The previous homeowners left the house very dirty, clearly had a mouse problem, and it was in poor condition in general. Removing this wall paper was a quick win for me to make it feel more like home!
2. Taking down the faux corner wall


I’ll never quite understand why this corner wall was installed. While I’ll admit that the living room side grew on me, the kitchen side was absolutely anti-functional. We did not want to have a galley kitchen, as this space was way too small to do that anyway. The island/peninsula was already there, why wall it off?
We didn’t know what was going to be underneath this corner wall, but we knew it would open up the space so much by removing it. One day we got bored and next thing we knew we were swinging a hammer…
We got REALLY LUCKY…
When tearing down this fake corner wall situation, we found a completely finished threshold underneath! This saved us a ton of time having to temporarily patch up the drywall.
2. Removing the Soffits


Sooo… our luck ran out.
We had every intention of removing this soffit over the oven, so we were shocked to find a header underneath the drywall in this spot. Of all the people we talked to about our plans and all the times we knocked on the underside of it (and it sounded hollow!), it never even occurred to us that we were going to run into this issue.
Needless to say, this completely threw a wrench in our original design plan. I was so frustrated and defeated.
This is going to sound so cheesy, but finding this header was the exact hurdle I needed to push me into creating a much more sophisticated kitchen design. The original plan was to have cabinets and a microwave above the stove… which is totally functional but such a boring design.
We’ve decided to roll with the punch, move the fridge, and create new plan that allows us to showcase a range hood!
3. Replacing the window


This window was literally rotting on the outside. Unfortunately, due to timing and prioritizing more important projects, we did had to go through 1 winter with the rotting window patched up with a lot of caulk. Thankfully, it held on long enough to provide protection from the snow! Certainly let in a draft however…
The rest of the windows in the house are only a few years old and are all white vinyl. This wouldn’t have been my first choice, however, we have no intentions on replacing the rest of the windows. So, the best option was to match the style that are already installed and in great shape.
We ended up going with a custom size white vinyl JeldWen brand window with a casement opening from Menards. It cost us around $450 and we were able to replace the window ourselves while we were replacing the siding.
The casement opening was the perfect choice to really maximize the amount of visibility to our backyard. Having only 1 window pane instead of 2, really makes the space feel bigger.
Once we had the window replaced, we had to pivot away from the kitchen renovation and focus on making sure our siding was sealed up for the winter. Along with the rotted window, there was a lot of mouse holes on that side of the house which was the source of our mouse problem.
4. Vacuum out and remove ceiling insulation
Come spring time, it was finally time to remove all of the insulation above the kitchen. This was a hot and messy job; and to be honest, we didn’t do the best job at it. In hindsight, we wish we would have found a better way to get more insulation out. Also, it would have been easier to clean up the blown in insulation that fell everywhere during ceiling demolition if we still had the insulation vacuum.
A couple other things we learned during this process:
- This was easier with 2 people: 1 person vacuuming and the other person operating the vacuum outside.
- The vacuum was HEAVY. The rental business used a skid steer to load the vacuum into the van we borrowed. So loading this vacuum back into the van to return it was incredibly difficult. In fact, we almost thought we were going to be able to do it. Make sure you have a ramp to help you load this back into your vehicle for return.
- Make sure you have duct tape on hand in case there are any holes in the hose or if there is a poor seal around where the hose attaches to the vacuum.
- Larger vacuum bags are not better! Once the vacuum bags are full of insulation, they become very heavy. I also recommend not over filling the bags.
5. Demolition
We ordered a big blue 15 yard dumpster and it was time to start tearing it down! We had the dumpster for a week and we filled it to the brim. This was just the right size, but having one slightly larger wouldn’t have been a bad thing. When you have a giant dumpster at your house, it’s amazing all of the junk you start finding all around your house.
Again, a couple of thing we learned along the way:
- If in doubt, size up the size of your dumpster and I recommend keeping it for at least 1 week.
- Make sure you have the right tools during demolition too, it will make demo go by much faster.
- Don’t skim out on PPE! You’re going to get very sweaty, so have extras on hand.
- A snow shovel is actually incredibly handy for shoveling up debris! It is large and light weight.
- FYI, removing every single drywall nail is going take way longer than you think it is.
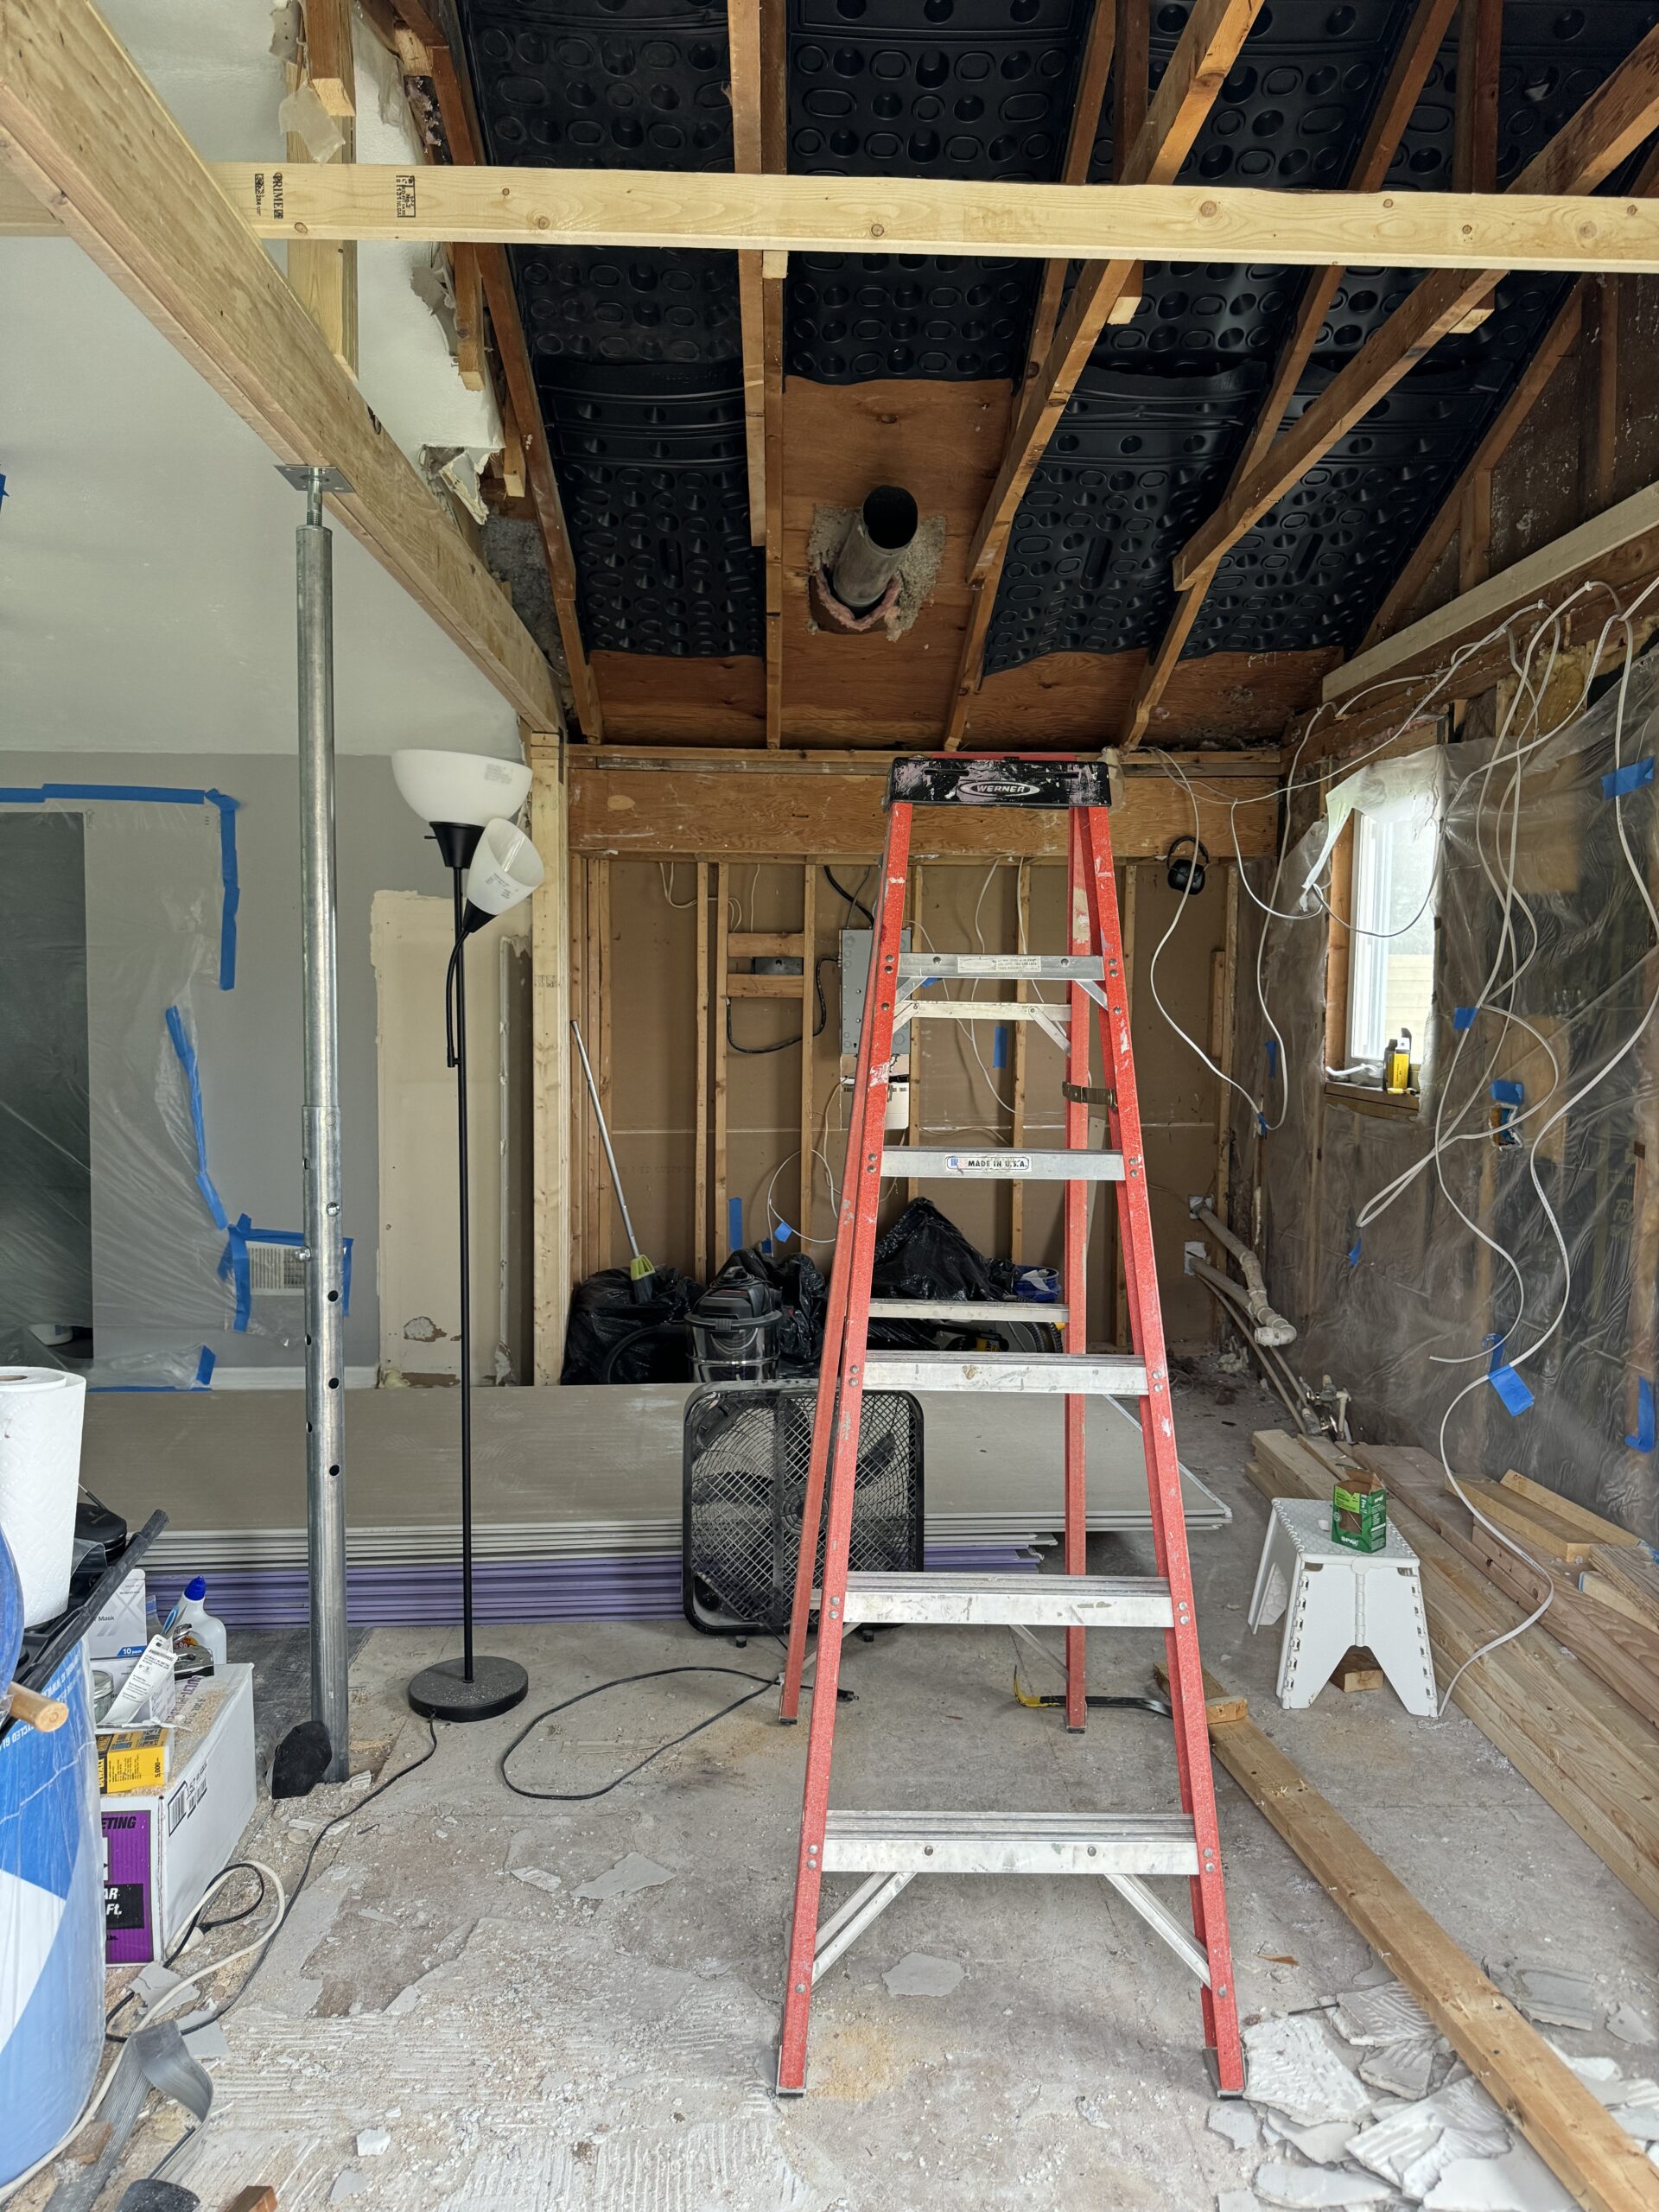
6. Structure integrity
Once we could see the structure of the house that was hidden underneath the drywall, we had to change plans. Originally, we were going to match the cathedral ceiling that is in the living room. But once we could see what was going on, we had to change plans. Instead of carrying the cathedral ceiling through from the living room, we raised the ceiling as much as we could and kept the load bearing support post. I’m sure we could have gotten the cathedral ceiling we wanted, but it wasn’t going to be worth the cost. Also, doing all of that would not be worth what we could potentially get back if we sell this home.
7. Install electrical and HVAC
My biggest piece of advice here is to be meticulous in planning where you want outlets and light switches. Now is your chance to add in as many outlets as you can and in the most convenient places. Dimmer switches are also a game changer, especially if you have an open concept kitchen and living room!
We didn’t have to change anything for the HVAC, but when we reinstalled it, we used a flush mount air vent. It is a small detail that make the kitchen look new and custom!
8. Drywall and Prime
Look, I don’t have many tips here…. To be honest, we wish we would have hired someone to do the drywall. I hate to be negative here, but this was not an enjoyable process for us. If you plan to do drywall yourself, the best tip I have is to avoid using pre-mixed drywall compound. We had more success with mixing our own compound.
Sheet rock is very heavy, drywall is incredibly dusty, and it just takes a lot of patience. If you’ve never drywalled an entire room before, give yourself enough time to tackle this part of the process.
9. Flooring
Installing the flooring really made the space feel like we were getting close to getting this kitchen renovation done! We decided to keep the flooring cohesive with the living room. Of course, the flooring we have went out of stock right before we began demolition. We were hoping that it would be back in stock by the time we needed to order it, but it wasn’t. We were worried it was actually discontinued…
TIP- most large stores procure their product from the same distributers/manufacturers. Our original flooring was the Home Decorators line from Home Deport. I was able to track down the manufacturer (MSI Flooring), which then matched up with some flooring sold by A&S Flooring on Home Depot’s website. Needless to say, I was able to find an exact match from a different brand!
10.
Check back for our next update! It is currently December of 2024 and we are working on the final details!
This post is all about how to remodel your kitchen and how we are going about our kitchen remodel. This post is full of kitchen remodel tips and kitchen renovation tips. Also, this post focuses on kitchen remodel inspiration and kitchen renovation inspiration. This is our kitchen fixer upper remodel!